Pre-Provisioning Steps
Before attempting to provision the desired phone, ensure that you have factory reset the device, enabled MPP for the desired extension and set the firmware to the most up-to-date version.
For information on completing these tasks before provisioning the desired device, please see the following articles:
Compatibility Warning
Polycom phones manufactured prior to 2014 must be updated to the latest firmware to ensure they are able to connect properly. A device that is on an older firmware will not be able to fully connect to the MPP system, and it will fail to provision.
SIP Credential Warning
Credentials that work for other vendors can be invalid for Polycom devices. Ensure the extensions SIP Authentication under the Security tab match the validated settings below.
- Authentication ID is 12 or less characters
- Authentication Password is 20 or less characters
- Authentication Password contains only alphanumeric and the following special characters: !, @, #, $, %, ^, &, *, ( or )
Provisioning the Phone Template
v20
Setting up the Phone Template
Video Walkthrough

- Login to the bvoip phone system.
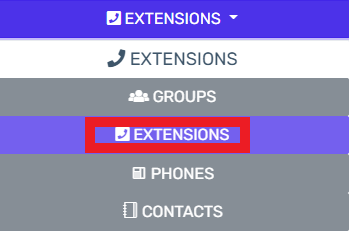
- Go to the Extensions > Extensions menu.
- Click on the Edit button next to the extension that the device is being added to, or create an extension.
- Go to the Provisioning > Deskphones tab.
- Click on the Add New Phone Device button. A pop-up will appear.
- Select the desired device manufacturer and model.
- Add the MAC Address without colon into the MAC Address field.
- Click the Save button. The pop-up for the provisioning will close and the page will refresh with new sections being shown.
- Depending on your provisioning method:
- Zero Touch: In the same menu, set MPP Enabled to Yes to enable zero touch provisioning.
- Manual/DHCP: Copy the Provisioning Link from the page, that should be plugged into the phone
- Click the Save button to save the phone template to the extension.
v18
Provisioning the Phone Template
- Login to the bvoip phone system.
- Go to the Extensions > Extensions menu.
- Click on the Edit button next to the extension that the device is being applied to. Click the Add button to create an extension that the device will be applied to.
- Go to the Phone Provisioning tab.

- Click on the Add New Phone Device button. A pop-up will appear.

- Select the desired device model in the Templates drop-down. This should be your specific phone model.
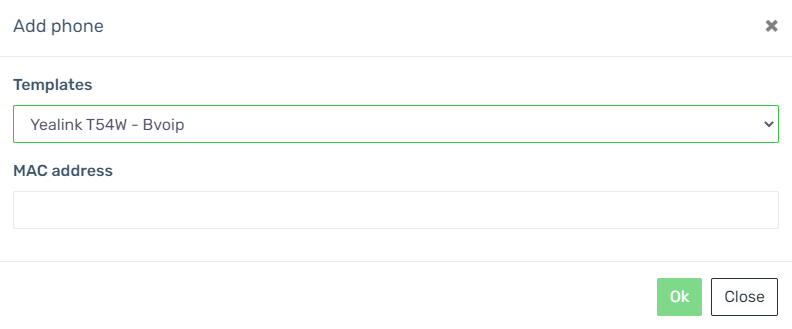
- Add the MAC Address without colon into the MAC Address field.
- Click the Save button. The pop-up for the provisioning will close and the page will refresh with new sections being shown.
- Click the Save button to save the phone template to the extension.
Checking the MPP Integration
Syncing Devices to MPP
To view the current MPP integration state, go to the Extensions > Devices Menu, and you'll see a menu like below

Controls
Across the top you have:
- Sync All Devices - This forces all devices to sync with the MPP server
- Refresh Devices - This refreshes the list against the MPP server
- Run health check - If you're seeing registration issues on a new system, this can autocorrect common issues
For each device, you'll find three buttons, left to right:

- Sync Device - Syncs this singular device with the MPP server
- Device Info - Provides info on the device according to the MPP server
- Delete - Allows you to remove a device, clearing its Remote Provisioning Server configuration
MPP State
Each device has a MPP column which informs you of the state
-
 - This device has not yet synced with the MPP server. Click Sync all devices or the purple button for that specific device
 - NEW - This device has synced to MPP, but has not been registered for Zero Touch Provisioning
- Configured - This device has registered for Zero Touch Provisioning successfully, and is waiting to be provisioned.
- Live - This device has completed its Zero Touch Provisioning process and should be active
- INVALID_INITIAL_PROVISIONING - This device belongs somewhere else. See MPP Provisioning Troubleshooting Steps for more details.
Factory Reset
Once the device has had the phone template and synchronized into the Managed Provisioning Portal, the device will need to be factory reset. When reset, the firmware will be updated and the configuration file will be accessed, pulling the provisioning details from the phone system.
For instructions on factory resetting your Polycom phone, please refer to our Factory Resetting Polycom Phones article.
After a factory reset and the phone coming online, it may take one additional reboot for the configuration to fully apply.
Provisioning the Phone Interface Directly
Polycom hard phones should be factory rebooted from the interface webpage before provisioning. Manual provisioning of the phone should not be required if you have successfully provisioned the Polycom phone using the instructions in the sections above.
If you are needing to provision the desired Polycom device directly after setting the template in the bvoip phone system, please refer to our Manually Provisioning Polycom Phones article.
Phone Still Not Provisioned?
If the phone has not provisioned with either sets of instructions, please refer to our Phone Provisioning Troubleshoot Guide.