1stream Core Required
1stream Core Required
This feature is available for only 1stream Core licensed users and higher plans. If you don't have this and would like this feature to be available, please reach out to your Sales Representative to upgrade user licensing.
Just Need to Pull a Report?
If you just need to pull a report that is not scheduled, please refer to our How to Pull Reports in 1Stream article.
How to Schedule a Report
- Log into the 1stream portal.

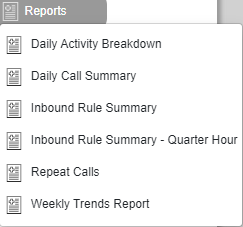
- Click on the Reports icon. A drop-down menu will appear with the available reports.

- Select the desired report. A pop-up will appear with the report's name and visual data, if available.
- Adjust the Date Range as desired.
- If the date was adjusted, click on the angle button to search the new dates.

- If the date was adjusted, click on the angle button to search the new dates.
- Click on the Calendar icon to schedule the report. The Report Schedules pop-up will appear.

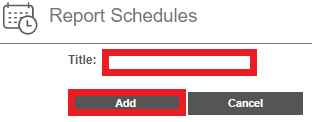
- Click on the Add Schedule button. The screen will refresh.

- In the Title field, name the scheduled report's name.

- Click the Add button. The Screen will refresh.

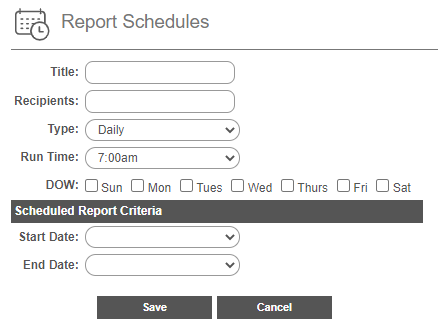
- In the Recipients field, input the desired recipients' email addresses.
- In the Type drop-down, select the desired option.
- In the Run Time field, select the desired time for the report to run.
- In the DOW section, select the desired days of week for the report to be ran on.
- In the Start Date drop-down, select the desired start date for the scheduling to start.
- In the End Date drop-down, select the desired end date for the scheduling to start.
- Click the Save button.
Want Additional Reporting?
For additional reporting, we offer the following options:
If you are not seeing the desired sort of reports, please reach out to our support team with your request or submit an idea request.