1stream Core Required
1stream Core Required
This feature is available for only 1stream Core licensed users and higher plans. If you don't have this and would like this feature to be available, please reach out to your Sales Representative to upgrade user licensing.
Feature Use Case
Client Contact Groups are intended to be a distinct grouping that you can utilize with the Inbound Contact Group Summary report, allowing to repeatedly pull call details with ease for specific companies, contacts, or groups of either.
Creating Client Contact Groups
- Log into the 1stream Admin Portal.
- Go to the Administration > Manage Organization menu in the top right.

- Scroll down to the Client Contact Groups section.
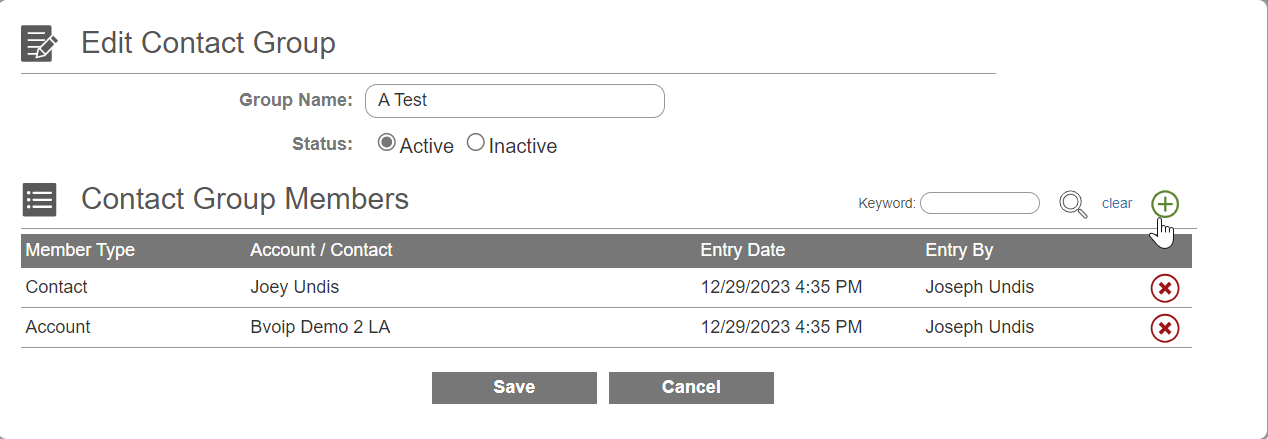
- Click the green circled + plus button. Add New Contact Group pop up will appear.

- In the Group Name field, enter a name.
- Click the Save button. The Edit Contact Group pop up will appear.
- Click the green circled + plus button to the right of Contact Group Members to add the desired contacts and accounts.
- Click the Save button.
Utilizing the Report
- Log into the 1stream portal.

- Click on the Reports icon. The screen will refresh with a listing of all the available reports.
- Select the Inbound Contact Group Summary Report. A pop up window will appear.

- Select the desired dates.
- Select the desired Contact Group.
- Click the right arrow to run the report.
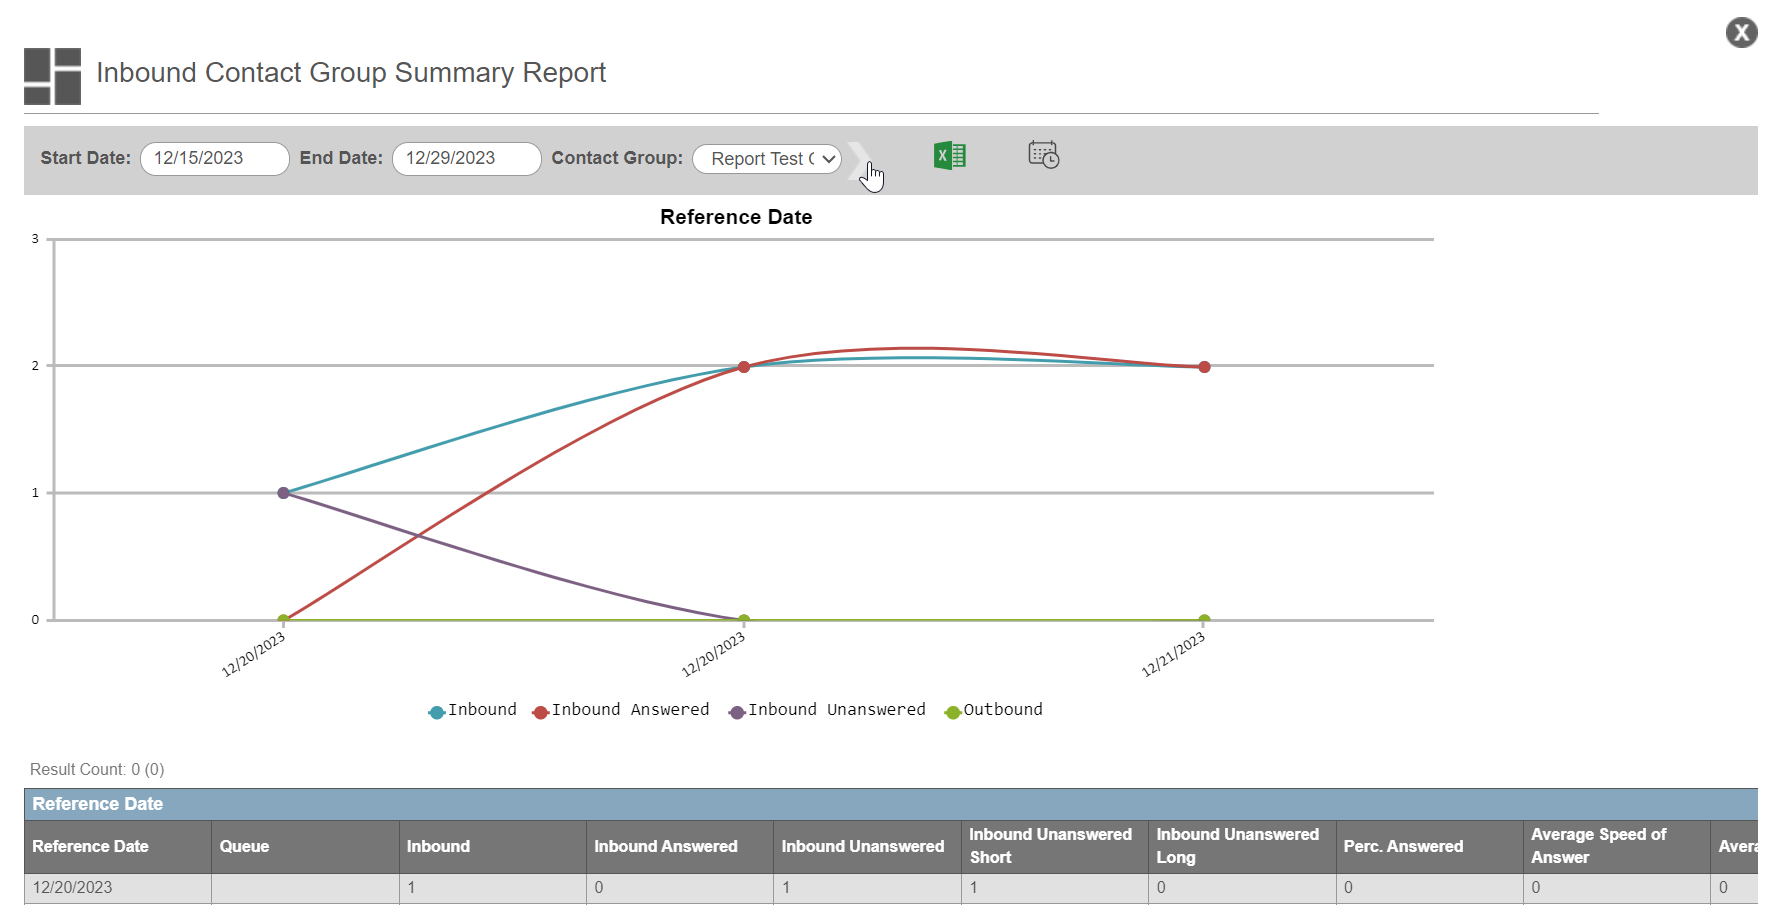
- You can choose to export the report with the Excel icon, or schedule the report to be sent via email each day using the calendar icon.