Whether due to porting or just having a new phone number being purchased, sometimes new numbers are needed to be added into the bvoip phone system.
v20
Adding DIDs
* Formatting
We recommend all numbers be stored as *[phone number] instead of [country code][phone number]. This ensures calls reach the system no matter how the trunking provider sends the calls.
I.e. *5550001234, not 15550001234
Video Walkthrough

- Collect a list of DIDs you're adding
- Go to Call Flow > SIP Trunks and edit your SIP trunk
- Go to the DID Numbers tab
- Depending on whether you need to add 10 or less, or more than 10 DIDs
- <10
- Enter in a DID in the top bar
- Click Add DID
- Repeat until each number is added
- Save and your DIDs should be accessible in the various routing spots of the system
- ≥10
- Download the DIDs Sample CSV
- Add your numbers as shown in the CSV template, removing the template text
- Click Import DIDs and select your template file
- Your DIDs should be imported and accessible in the various routing spots of the system
- <10
- Save the trunk to finish
Assign or Remove a DID

- Edit an Extension, Department, Ring Group, Call Queue, or IVR in the system
- At the bottom of the page, search for and click on your free DID that you want to assign.
- If you want to remove it, simply click it on the left under the Assigned DIDs list.
What happened to inbound rules and out of office routing?
In v20, this has been replaced by the concept of directly assigned DIDs to IVRs and departments. If you want a number to follow a specific business hours route, you can either:
- Follow Creating Extension Departments/Groups to create a department that handles the hours and routing of many numbers that perform the same tasks
- Or point at an IVR, and that has it's own “Out of Office” routing that follows the Department hours. This allows different numbers to have different out of office routes, but sharing the same business hours.
v18
SIP Trunk Check
Before adding the numbers into the bvoip phone system, the first thing to keep in mind is if the phone number that is being added is associated with the current SIP Trunk provider. If not, a new SIP Trunk will need to be created.
For guidance on this, please refer to our Setting up SIP Trunks article.
Adding the DID to the SIP Trunk
If the phone number is being carried by the existing SIP Trunk provider, then the existing SIP Trunk in the phone system will need to be edited to include the new phone number.
- Log into the bvoip phone system.
- Click on the Call Flow drop-down menu.
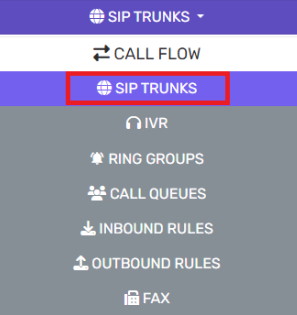
- Go to the SIP Trunks subsection.
- Select the pencil button to edit the desired SIP Trunk.
- Navigate to the DIDs tab.

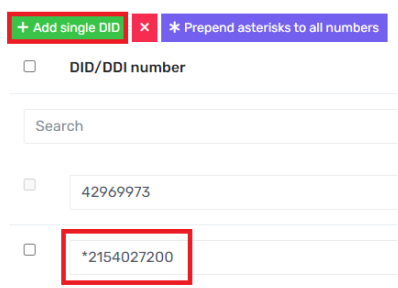
- Click on the Add Single DID button. A blank field will appear.
- Add the new phone number into the blank field. Note: Be sure to replace the 1 at the beginning of the phone number with an asterisk.
- Repeat as needed for each phone number to be added.
- Click the Save button.
After the phone number has been added to the SIP Trunk, the routing will need to be setup in Inbound Rules.
Adding the DID to the Inbound Rules
After the phone number has been added into the SIP Trunk, the phone number will then need to be added into Inbound Rules to setup the routing. For Guidance on this, please refer to our Setting up Inbound Call Rules article.