v20
Call recordings can be found in several places, including in the phone system as well as in 1Stream's admin and client panels.
Want to Enable Call Recording?
Please refer to our Call Recording Notifications and Options article which will cover activating the option on different levels in the bvoip Phone System as well as how to set the notifications and opt-in/opt-out options.
Accessing Recordings
Once call recordings are enabled, admins can access them inside the Storage menu. To access the recordings and download, follow the steps below.
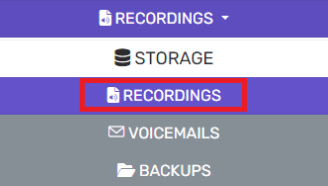
- Go to Storage > Recordings in the phone system

- The screen will list all recordings that are available
Note: The search bar can be used to find specific recordings. - Click the Delete button should any recordings need to be removed.
Note: Multiple recordings can be selected by using the checkbox beside the recording date. - Click the Download button to download each recording.
Call Recordings and 1Stream
Call recordings can also be accessed in 1Stream and attached to tickets. Please refer to the following articles:
Recording Retention
Default Retention
Automatic retention is turned on by default, and will automatically delete recordings after 30 days.
To disable or adjust this setting, you can adjust the system Parameter values.
- Go to Dashboard > Settings in the phone system
- Open the Parameters subsection
- Search for delete_rec
- To disable automatic retention entirely, set INST_AUTODELETE_RECORDINGS to 0
- To change the retention time period, update DELETE_RECS_OLDER_THEN from 30 to another value
v18
Call recordings can be found in several places, the bvoip phone system has different locations that these recordings can be activated, but call recordings can be found in the bvoip system as well as in 1Stream.
Want to Activate Call Recordings?
Please refer to our Call Recording Notifications and Options article which will cover activating the option on different levels in the bvoip Phone System as well as covers how to set the notifications and opt-in/opt-out options.
Accessing Recordings
Once call recordings are enabled, users will be able to access them from the tool as well. To access the recordings and download, follow the steps below.
- Log into the bvoip phone system.
- Click on the Storage drop-down menu.

- Go to the Recordings subsection. The screen will default to an additional Recording subsection tab. Note: The search bar can be used to find specific recordings.
- Click the Delete button should any recordings need to be removed. Note: Multiple recordings can be selected by using the checkbox beside the recording date.
- Click the Download button to download each recording.
Recording Settings
- Go under the Quota tab in the Recordings menu
- Check Send email when size of local recordings folder is disabled and then set a value, defaults to 75%
- When this is reached, the system notification emails will receive an alert.
- Check Automatically delete all recordings from the local recording folder older than X days, set the date value to how long you want to retain recordings for
- If set to 30, 30 days after a call is recorded the recording will be deleted from our system.
- You can check Compression to save some additional storage on your server, however it causes recordings to no longer be playable in the web and you have to use a third party media tool to play them.
Call Recordings and 1Stream
Call recordings can be accessed in 1Stream and attached to tickets. Please refer to the following articles: