1stream View Required
1stream View Required
This feature is available for only 1stream View licensed users and higher plans. If you don't have this and would like this feature to be available, please reach out to your Sales Representative to upgrade user licensing.
Why Use Custom Statuses
Custom statuses allow for administrators to have tailored views on where or why an agent is or is not available.
Once an agent is using Custom Statuses, the bvoip web client internal status is bound to that custom status and changing it in the normal phone system web client will have no effect afterwards. Users will need to toggle their custom status from within 1Stream moving forward.
Enterprise Users Advanced Functionality
Enterprise licensed 1stream Users can use the custom statuses inside of the Supervisor Dashboard to adjust a user's status. For information on this, please see our using Custom Statuses in the Supervisor Dashboard article.
How to Create Custom Statuses
- Log into the 1Stream Admin Portal.
- Go to the Administration > Manage Organization menu in the top right.

- Scroll down to the Phone System Enhancements section.
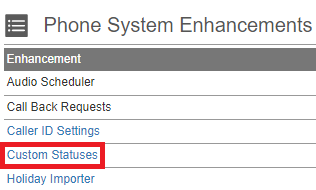
- Click on the Custom Statuses option. The Manage Custom Statuses pop-up will appear.

- Click the green circled + plus sign button. The Add New Custom Status pop-up will appear.
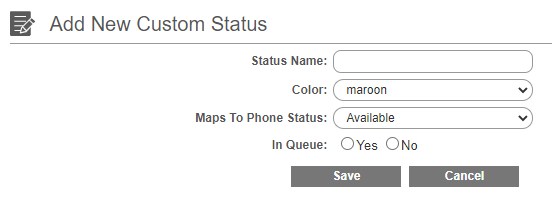
- In the Status Name field, input the desired name of the status.
- In the Color drop-down, select the desired color for the status.
- In the Maps to Phone Status drop-down, select the desired status.
- For the In Queue option, select if the status logs users into or out of queues.
- Click the Save button.
User will then be able to update their status using the custom statuses from the drop-down in 1stream.
Further Customization
Once a status is created, you can re-open the status to get additional options.

- Color: Self explanatory, this is the color shown in the various UIs for differentiating statuses.
- Maps to 3CX Status: Set this to the phone system status you want to match to
- Active: If set to No, the status will be hidden
- Auto Process Exempt: When enabled, users will not be automatically moved from this status for things like the Queue Change Signal Setup.
- Use On Auto Queue Log In: Status will be used when automatically logged in for Queue Change Signal Setup.
- Use On Auto Queue Log Out: Same as above but for the logout action
- Auto Change To: Set this to the name of another Custom Status to automatically change to that status after Auto Change Seconds have passed.
Teams and Custom Statuses
As Teams Statuses do not sync with the Phone System at this time, we recommend setting up the 1stream Custom Statuses inside of the Teams 1stream application which will make it possible for users to update their status without leaving the Teams application.
Utilizing Custom Statuses
Once the Custom Statuses have been created on the 1stream Administrator side, 1stream end users can begin using them as outlined below.
- Login to the 1stream Browser Extension.
- In the upper right-hand corner of the 1stream browser extension is a Status drop-down menu.

- Select the desired status from the list. This will update the agent's status in the bvoip web client and log the agent in or out of the Call Queues based on what has been created on the 1stream Administrator side for each status.
Moving forward, any agent who needs to then update their status must now use the Custom Status tool from the 1stream extension. Updating the status in the web client will have no effect.
Custom Statuses and the Q Button
When using custom statuses and setting the Queue log in/out setting, that becomes the primary method for logging into or out of queues. Users can still log out of queues individually, however logging out of all queues will be overridden by a status set to In Queue: Yes.