1stream View Required
1stream View Required
This feature is available for only 1stream View licensed users and higher plans. If you don't have this and would like this feature to be available, please reach out to your Sales Representative to upgrade user licensing.
Zendesk Version Notice
Depending on your Zendesk version, there may be a visible Terms checkbox that needs to be selected after step 4. Once the Terms checkbox is selected, click on the Get Started button.
If you do not see the Terms checkbox, continue with the steps as written.
Generating the API Key
- Log into the Zendesk Admin Center.
- Scroll down to the Apps and Integrations section.
- Scroll down to the APIs subsection.
- Select the Zendesk API option. The page will refresh showing the Zendesk API page.
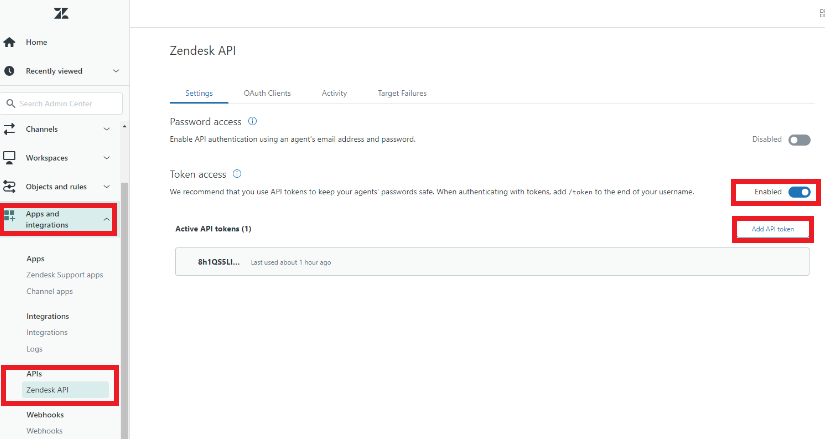
- Go to the Settings Tab.
- Click on the Slider Toggle to Enable Token Access.
- Click the Add API token button. The API Token screen will appear.
- In the API Token Description field, input a description for the token if desired.
-
Copy the API Token. The token is only viewable once, be sure to paste it somewhere safe.
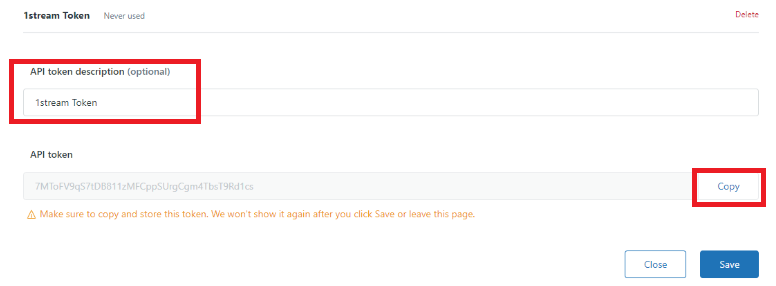
- Click the Save button.
Adding Zendesk in 1stream
- Log into the 1stream Admin Portal.
- Go to the Administration > Manage Organization menu in the top right.

- Scroll down to the Connected Account and CRM Settings section.
- Click on the green circled + to open the configuration pop-up.
- Select Zendesk in the CRM Platform drop-down.
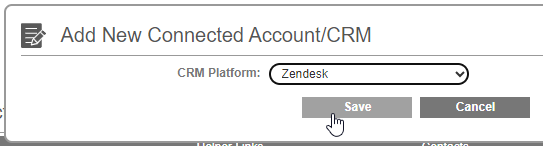
- Click the Save button. The pop-up will refresh with the connection configuration settings.
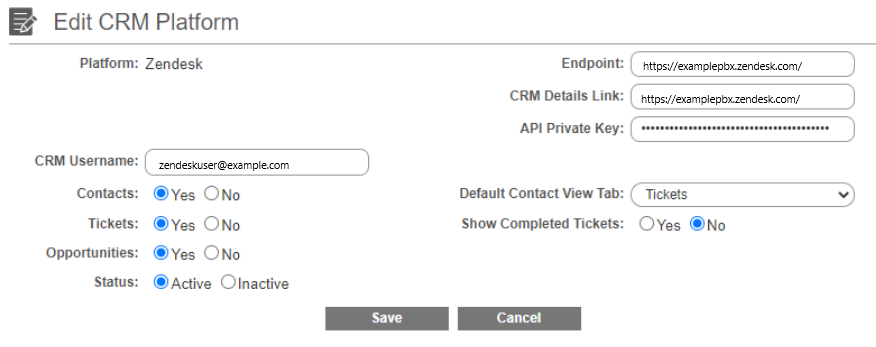
- In the Endpoint field, input the base URL for your Zendesk instance with a slash at the end.
- In the CRM Details Link field, input the base URL for your Zendesk instance with a slash at the end.
- In the API Private Key, input the generated API Token.
- In the CRM Username field, input the Zendesk username. Be sure that this user has the Administrator role.
- Click the Save button.
- Scroll Up to the 1stream Administration section.
- Click on the Systems Check link.
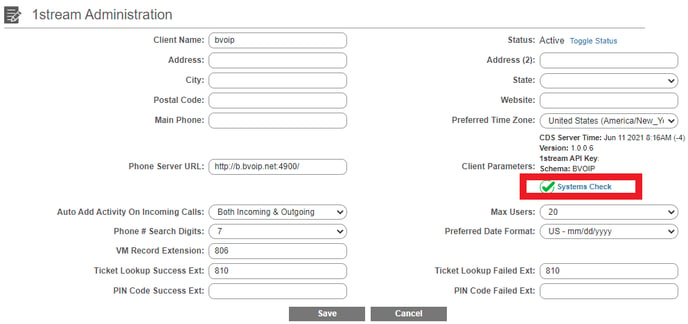
There will be a pop-up that appears and confirms if the connection was successful or if there was an issue that needed to be corrected. This will also pull in the user data from your Zendesk connection that will be reflected when users are added in the next section.
Mapping CRM Users
Once the CRM Connection to Zendesk has been completed, the users in 1stream can be now mapped to their corresponding Zendesk user.
For instructions on how this can be done, please see our Mapping CRM Users article.