Script Execution Policy
Within PowerShell ISE you will need to run the following command to allow the downloaded scripts to run on your system:
Set-ExecutionPolicy Unrestricted
Press the Enter key. A pop-up will appear for Execution Policy Change.
Click the Yes to All button.

Setting Caller ID Behavior
The caller ID behavior must be set prior to running the Teams activation scripts as it will change the content of the scripts and can potentially remove the need to run the Users Office Phone script.

Planning on Using Teams Voicemail?
If you are looking to user Teams voicemail, please see our Setting up Teams Voicemail article. In an effort to prevent step duplication, we recommend activating user teams voicemail prior to running the scripts in this article.
Running the Teams Activation Scripts
- Login to the phone system.
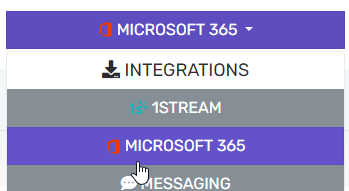
- Go to Integrations > Microsoft 365 in the top right.

- Go to the Direct Routing tab.
- Ensure that the Prefix at the top is set to your country code if you don't use +1, then click Save Changes next to it.
- Scroll down to the Microsoft Teams direct routing resources section. This section with the two underneath contain a total of 3 scripts that need to be downloaded and ran in PowerShell ISE as Administrator:
- Microsoft Teams Direct Routing Resources
- This script will create the necessary SBC, dial plans, and calling policy.
- After this script successfully completes, you can remove the test user from your Teams tenant and reclaim the license.
- Activate New Users
- This script will assign each user to the above dial plan and calling policy, as well as enable the enterprise voice capabilities.
- Only users that have a Teams Phone Standard license applied to their user will show up in this list. Assign the licenses and wait 15 minutes, then refresh the page before redownloading the script.
- Users Office Phone
- There are two scripts. Pick one or the other, not both, depending on if you synchronize your directory from a local Active Directory.
- This script will set each user's Office phone field to +<country code><ext>, which then gets imported down as the Caller ID field on the extension.
- Ensure any other systems that utilize this field, such as signature templates, get adjusted to use a different field. If you wish to retain this field for templates, you can instead manually set the Microsoft 365 Office phone, and Teams Assigned phone number to be formatted as +<country code><phone number>, and that will be shown as their Caller ID.
- Microsoft Teams Direct Routing Resources
- After the scripts have been ran, Teams will be enabled for the selected users. Keep in mind that it can take up to 24 hours for Microsoft propagation to take place, however most users should see the dial pad in Teams within 30 minutes after a refresh.
Next Steps
Once the scripts have been run, the following items must be reviewed and actioned:
- Set the outbound rules for the integration so that calls are able to be made out. Please read through Setting Teams based Outbound Rules for that.
- If you are using call queues, you will need to adjust your call queue ring time to be less than 20 seconds so that it will not trigger the voicemail, as Teams routes calls to voicemail at 20 seconds by default.
- If you are looking to use Teams voicemail, please see our Setting up Teams Voicemail article.
- If you're having calling issues, please see our Teams Not Making and Receiving Calls article.
Using 1Stream?
If you're planning on using Teams, and you're licensed for 1Stream integrations, you can add the 1Stream Teams application to make it more convenient to access.
Check out our article Setting up the 1Stream Application for Teams.