Why Change Permissions in 1stream?
The Permission Groups in 1stream allow for administrative users to determine the items that other users can have access to in the 1stream client and Admin Portal.
Users who are granted the Admin Portal Access right are granted access into the admin portal where they can then adjust these groups.
What Permissions are Available?
Portal Permissions
- Access 1stream Portal: Can the user access the 1stream portal/homepage. This is NOT the client, everyone has that access no matter what.
- Manage Organization: Can the user access the Manage Organization menu that gives access to the admin settings?
Group Permissions
- 1stream Client Permissions
- EditContact - Allows editing of contact information (Core+)
- Client Top Fields - Deprecated permission
- AddTicket - Allows adding a ticket to the CRM (Core+)
- EditTicket - Allows editing a ticket in the CRM (Core+)
- AddCompany - Allows adding a company in the CRM (Core+)
- AddContact - Allows adding a contact in the CRM (Core+)
- 1stream Admin Permissions
- Each permission here just dictates whether or not the user has access to modify the components for the named feature.
- Connected CRMs
- Note Templates (Core+)
- Screen Pop URLs
- Client Access API Keys (Core+)
- Ticket Form Snapshots (Core+)
- Manage Teams
- Call Dispositions (Power+)
- Inbound Call Scripts (Engage+)
- Voice Mail Files (Power+)
- Alerts
- Marked Contact Titles
- Marked Contact Territories
- DID/Voice Prompt Management (Power+)
- Notifications - On Call Management (Engage+)
- Audio Scheduler
- Caller ID Settings
- Contact Priority Routing (Engage+)
- Custom Statuses
- Filter Groups (Enterprise+)
- Holiday Importer
- Recording Beep
- Transcription & Analytics Settings (Enterprise+)
- WebHook Registrations (Core+)
- User Management
Default Permission Groups
Basic User
- Access 1stream Portal: No
- Manage Organization: No
- Permissions
- EditContact
- AddTicket
- EditTicket
- AddCompany
- AddContact
Admin
- Access 1stream Portal: Yes
- Manage Organization: Yes
- Permissions
- All
Creating New Permissions
- Log into the 1stream Admin Portal.
- Go to the Administration > Manage Organization menu in the top right.

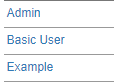
- Scroll down to the Permissions Groups section. By default, there are two groups that pre-exist: Basic User and Admin.
- Basic User - This Group has access to Add Contact, Edit Contact, Add Company, Add Ticket and Edit Ticket by default.
-
Admin - This Group has access to all permissions by default.

- Click on the circled green + plus sign. The Add New Permission Group pop-up window will appear.
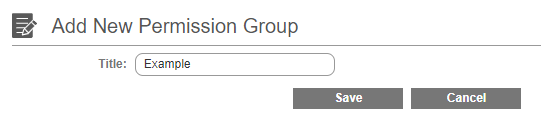
- In the Title textbox, input the name for the desired permission group.
- Click the Save button. The Permission Group is created and will need to be edited.
- Click on the name of the permission. The Edit Permission Group pop-up window will appear.
- Select the desired access for the Access 1stream Portal. This option at the top controls whether users can reach the 1stream Portal, which grants them the ability to reach reports and update admin settings.

- Select the desired access for the Manage Organization option. This setting is what allows users to manage settings like these.
- Click on the checkboxes in the Permission Setting to add/remove permissions as desired.
- Click the Save button.
Applying Permission Groups to Users
- Log into the 1stream Admin Portal.
- Go to the Administration > Manage Organization menu in the top right.
- Scroll down to the CRM User Mappings section.
- Edit the desired username, in the table with the edit icon or you can double click the username.
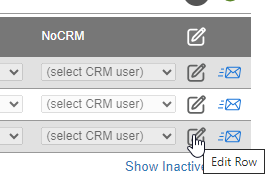
- Set the Role column to the desired permission group.
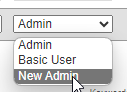
This autosaves in the table as you change it, you do not have to hit the Save button at the top.