1stream Core Required
1stream Core Required
This feature is available for only 1stream Core licensed users and higher plans. If you don't have this and would like this feature to be available, please reach out to your Sales Representative to upgrade user licensing.
Unsure About Building Custom Widgets?
For guided detail on building widgets within MSPBots, please refer to their Knowledge Base for the most up to date information.
Generating an MSPBots Dashboard
Once you've connected 1stream to MSPBots, you can utilize the built-in widgets on your dashboards.
- Log into your MSPBots account.
- Click the Dashboards button.
- Click New Dashboard and provide the dashboard a recognizable name.
- Click on Continue.
- Click on Add Widgets in the center of the page on empty dashes. Click the Design button to edit an existing dashboard.
- Click on Widgets List.
- Select Template Widgets to display all built-in widgets. To leverage a widget that you have created yourself, it will be on the My Widgets tab.
- Click bvoip in the Integration Group panel to filter the widget list to display ONLY bvoip widgets.
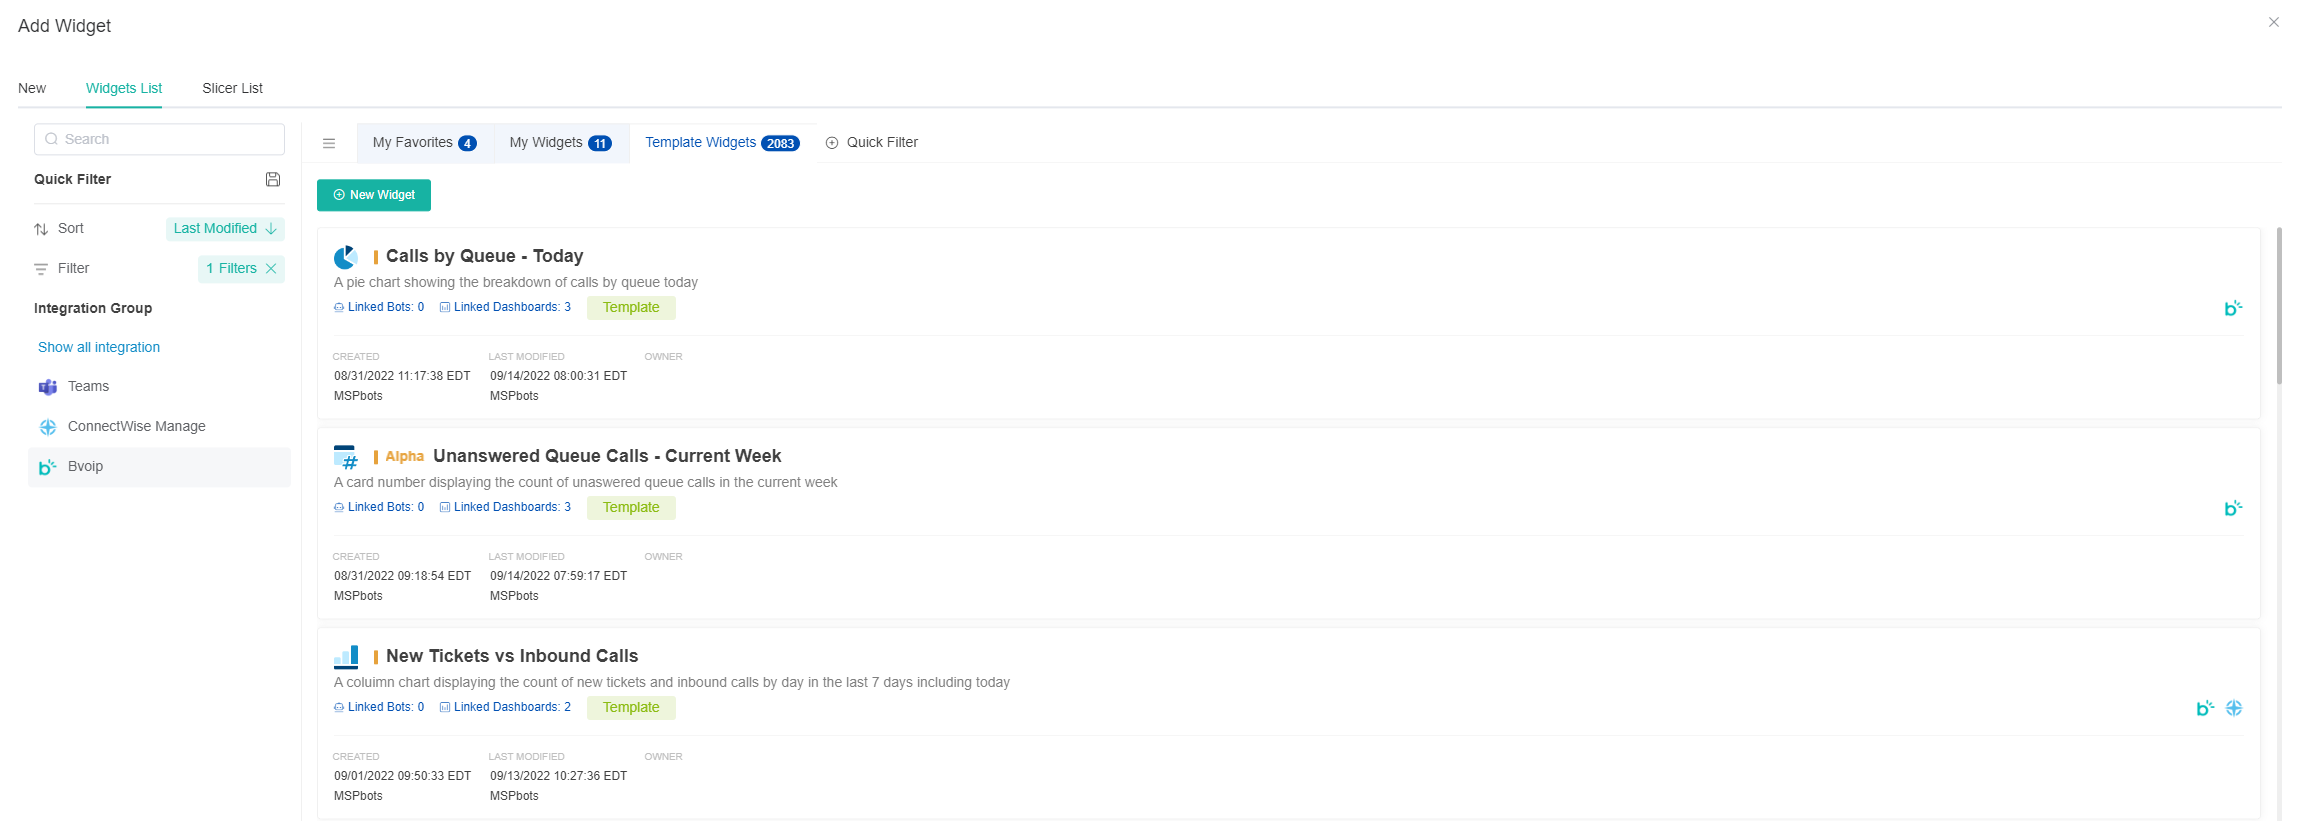
- Click to select any widgets you'd like to use. Multiple widgets can be selected.
- Click the Add button.
- Drag and drop the widgets into your preferred position.
- Click the Save Dashboard button. Your dashboard is now ready to be displayed or shared.
