1stream Engage Required
1stream Engage Required
This feature is available for only 1stream Engage licensed users and higher plans. If you don't have this and would like this feature to be available, please reach out to your Sales Representative to upgrade user licensing.
Setting up the Security PIN in Autotask
- Log into Autotask.
- Go to the Autotask menu.
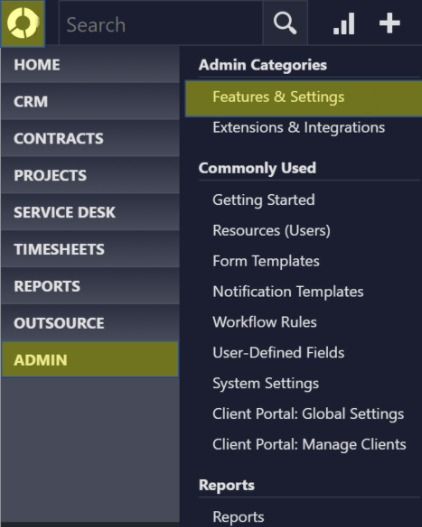
- Scroll down to Admin section.
- Go to the Features and Settings subsection.
- Scroll down to the Application-Wide (Shared) Features section.
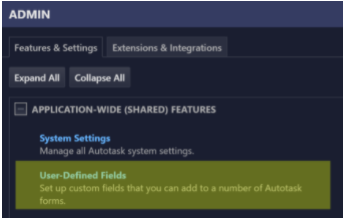
- Select the User-Defined Fields option.
- Go to the Contacts tab.
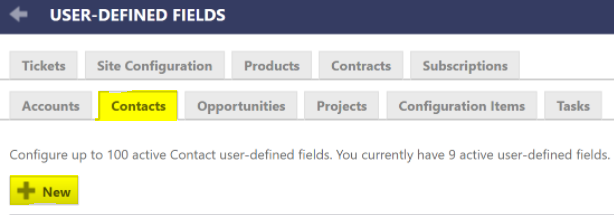
- Click on the +New button. The page will refresh to where a User Defined Field can be generated.

- In the Name field, enter the text SupportPIN.
- In the Description field, enter the text Support PIN.
- Leave the Required checkbox blank.
- In the Sort Order field, input the value of 1.
- Select Text (Single Line) from the Field Type drop-down.
- Leave the Default Value field with no value.
- Select the Active checkbox.
- Click the Save and Close button.
The Support PIN will be reflected under any Contact so that it can be setup for PIN Based Call Routing.