1stream Engage Required
1stream Engage Required
This feature is available for only 1stream Engage licensed users and higher plans. If you don't have this and would like this feature to be available, please reach out to your Sales Representative to upgrade user licensing.
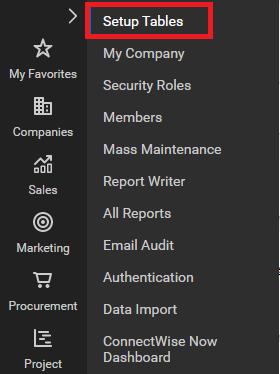
Setting up the Security PIN in ConnectWise
- Log into ConnectWise.
- Click on the System icon.

- Go to the Setup Tables option.
- Search for Custom Field in the Table column.
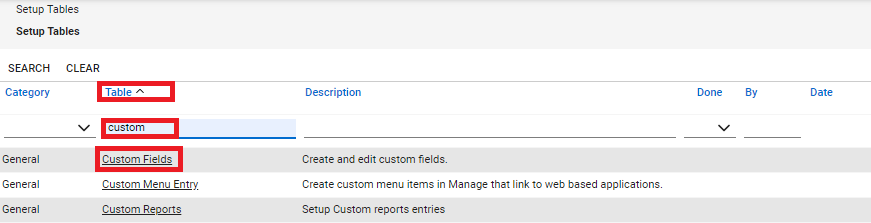
- Click on the Custom Field option that appears.
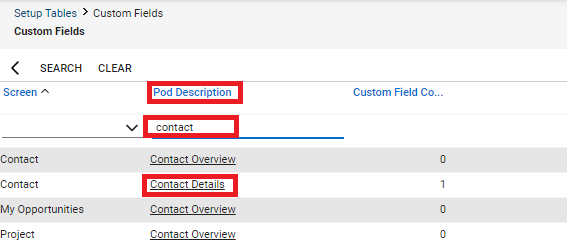
- In the Pod Description column, locate and click on Contact Details.
- Click the + plus button to open the Custom Fields section. The Add New Custom Field section will appear.
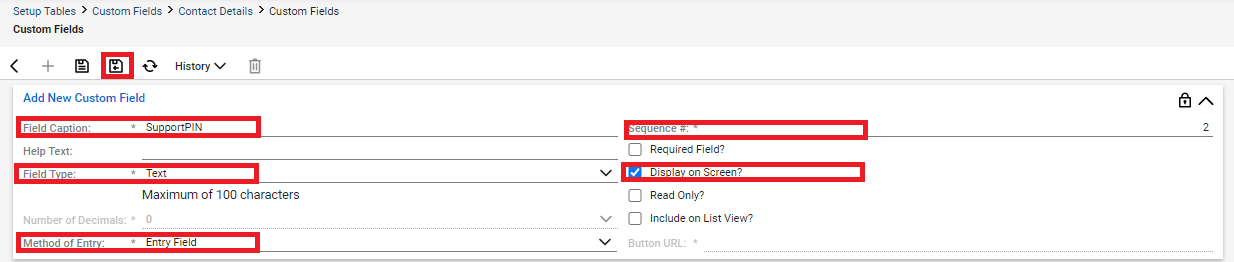
- In the Field Caption field, input the text SupportPIN.
- Choose the Text option from the Field Type drop-down.
- Choose the Entry Field option from the Method of Entry drop-down.
- In the Sequence # field, leave it as the current number (unless re-ordering this field in regards to other custom fields.)
- Check the Display on Screen? option.
- Click the Save and Close button.
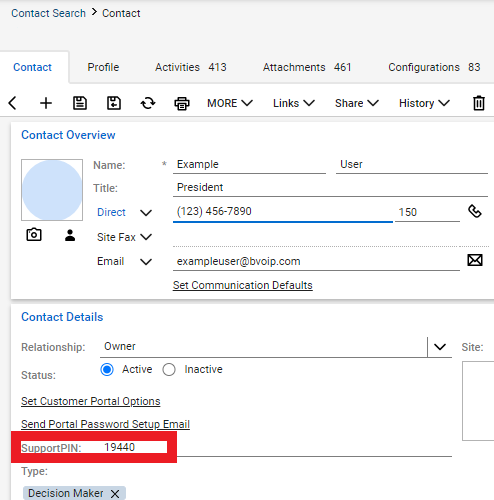
Once the PIN field is setup, it will then reflect in all ConnectWise users so that Security PIN Routing can be setup as clients add PIN numbers to their accounts.