1stream View Required
1stream View Required
This feature is available for only 1stream View licensed users and higher plans. If you don't have this and would like this feature to be available, please reach out to your Sales Representative to upgrade user licensing.
Looking to configure phone system emails?
See our article Setup Custom Email for Microsoft 365 for how to configure the emails that come from the phone system layer of things.
Why Use Microsoft 365 Email?
By default, all emails sent via 1stream are sent using our third party mail queueing system, which can cause delays or outages that you would otherwise not see using your own mail server. Especially when it comes to newer email addresses, it's easy to end up on our suppression list and your own mail server avoids that issue entirely.
This will replace the email capability for the PIN Verification Tool and Signal's Voicemail Monitoring.
Setting up Permissions in Azure
- Log into Entra ID Admin Center.
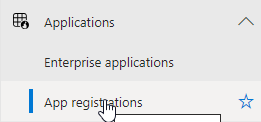
- Go to Applications > App registrations.

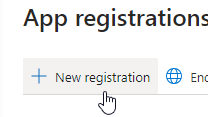
- Click New registration.

- Enter in the name 1streamEmail
- For the Supported Account Type, select the Accounts in this organizational directory only option.
- Click the Register button.

- Copy the Application (client) and Directory (tenant) IDs.

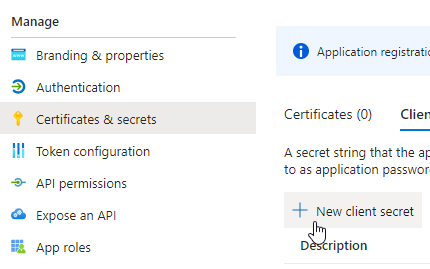
- Open the Certificates & Secrets option.
- Click on the New Client Secret button.

- In the Description field, input a description.
- For the Expires section, select 730 days (24 months).
- Click the Add button. The Client Secret will then be visible.

- Copy the Client Secret Value.
- Note: This client secret is never shown again, so make sure you copy it now.
- Go to the API Permissions section.
- Click on the Add a Permission button.

- Select the Microsoft Graph button.
- Click on the Application Permissions button.
- Locate and expand the Mail permission group.
- Select the Mail.Send permission.
- Click the Add Permissions button.

- Click the Grand Admin Consent button. A pop-up button will appear for consent confirmation.

- Click the Yes button.
Setting up the 1stream Side
- Log into the 1stream admin portal.
- Go to Administration > Manage Organization in the top right.
- Scroll down to the Connected Accounts and CRM Settings section.

- Click on the green circled + plus button. The Add New CRM Platform pop-up will appear.
- In the CRM Platform drop-down, select Office 365.
- Click the Save button. The Modify Office 365 Connection Settings pop-up will appear.
- In the App ID field, paste the Application (client) ID.
- In the App Secret field, paste the Client (App) Secret.
- In the Integration Code field, paste the Directory (tenant) ID.
- In the Sending Email field, enter the username of the mailbox that will send messages
- This must be a real mailbox, not an alias, but it can be an unlicensed Shared Mailbox.
- Click the Save button. The pop-up will close.

- Emails should now flow through your system instead of our default queue.