Setup Pre-requisite
This process will require that you open a ticket with bvoip support to retrieve the SMS Webhook and also to relay the following details:
- User - Your username for Bandwidth portal.
- Password - Your password for Bandwidth portal.
- App ID - Application ID of previously created application.
- Account ID - Account ID found at the top right corner of the Bandwidth portal in brackets.
Bandwidth Setup Process
Create an Application.
- Login to your Bandwidth portal.
- Go to Applications and select +Create Application.
- Fill in the Application Name, select Messaging as the application type.
- Enter the SMS Webhook URL received from bvoip support.
- Enable all the Status Callback Types.
- Click on Create Application on the bottom right and take note of the Application ID. This becomes automatically populated once the application is created.
- Navigate to the Associated Locations section below the application form and select your location from the drop down menu.
- Select your location and navigate to the Messaging tab, enable the SMS/MMS, V2 Messaging, select the application you created and save changes.
Associate the number you want to use for SMS with the newly created Location.
- Navigate to the Numbers > My Numbers and click on Search.
- Click your number.
- Under Move Number, select the Sub-Account and the newly created Location and click on Move Number.
Creating Inbound Rules
After the SMS connection has been built into the phone system, inbound rules must be created for each SMS DID, if they are not created already. The inbound rules indicate which route the SMS should follow. SMS DIDs can be assigned to an extension user or call queue.
- Log into the bvoip phone system.
- Click on the Call Flow drop-down menu.
- Go to the Inbound Rules subsection.
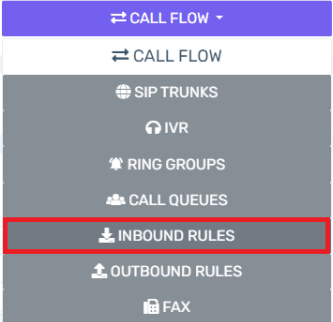
- Create a new Inbound Rule by clicking the Add DID button.

- Scroll to the Trunk Details section.
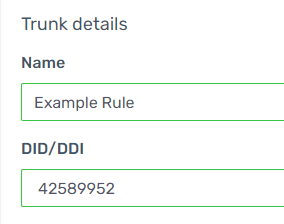
- In the Name field, list a name to differentiate it from other DIDs.
- In the DID/DDI field, select the desired DID from the drop-down. Make sure that the DIDs have +1 in the front of the number.
- Go to the Route Calls To section.
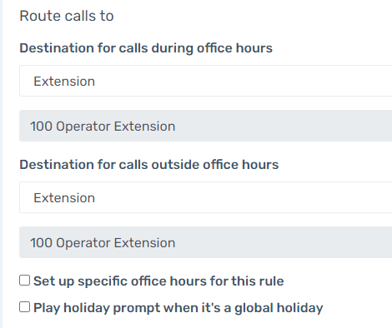
- Select the Destination For Calls During Office Hours by clicking on the two drop-downs beneath it.
- This should be either a direct extension user or call queue for the purpose of SMS.
- Select the Destination For Calls Outside Office Hours by clicking on the two drop-downs beneath it.
- This should be either a direct extension user or call queue for the purpose of SMS.
- Click the Save button.
Routing to a Call Queue
If a Call Queue is selected in the Route Calls To option, this can allow members of that call queue to receive all new incoming SMS messages. Whoever then replies first to the SMS message is now the owner of the Chat.