What is Nesting?
Nesting is the term used for when a destination is linked to another destination in the phone system such as an IVR that links into another or a call queue that leads to another.
Creating the Nesting Destinations
The first step for nesting is to create the destinations in full so that they can then be connected. Our articles for the set-up of these items are below.
Setting up the Nesting Flow
Once all of the destination Auto-attendants and call queues have been built out, they can be nested into each other based on the intended call flow.
Nesting Call Queues
- Login to the bvoip phone system.
- Click on the Call Flow drop-down menu.
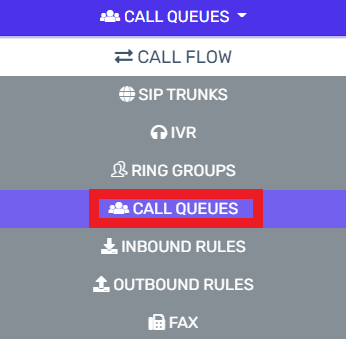
- Go to the Call Queues subsection.
- Click the pencil icon to edit the existing call queue.
- Go to the General Tab.

- Scroll down to the Destination If No Answer section.
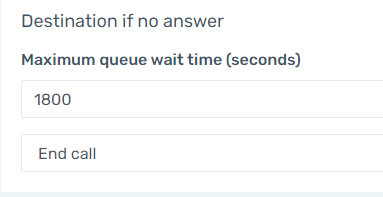
- In the Maximum Queue Wait time field, set the number of seconds a call should wait in in total.
- In the drop-down below the wait time, select the desired next queue or ring group.
- Click the Save button.
Nesting Auto-Attendants
- Login to the bvoip phone system.
- Click on Call Flow drop-down menu.
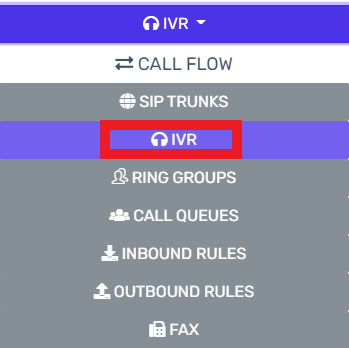
- Go to the IVR subsection.
- Click the pencil icon to edit the existing auto-attendant.
- Scroll down to the Menu options section if it is desired to have an IVR nested at a key press level.
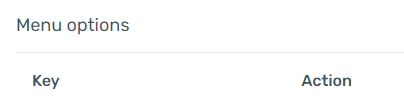
- In the Action drop-down, select the Connect to Digital Receptionist option to setup another IVR for the selected key number.
- In the Destination drop-down, select the desired IVR to be connected to.
- Click the Save button.